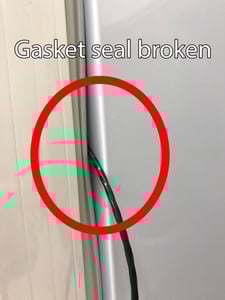
Whether you’re storing valuable vaccines or sensitive samples, a stable temperature in your refrigerator or freezer is vital. One problem we often encounter is when users compromise the stability of their laboratory and medical units by running data loggers and thermometers through the door gasket. This set-up allows excess air to enter the unit and forces the compressor to work harder in order to keep the internal temperature stable. This kind of unnecessary strain on the compressor eventually leads to complete failure, potentially jeopardizing precious samples, and thousands of dollars’ worth of vaccines. In order to remedy this, we suggest running data loggers and thermometers through the designated probe access port, which you can find on all of our Futura and Clinicool© Refrigerators and Freezers.
You can do this yourself, with no specialist knowledge, and it’s easier than you might think:
Tools Needed
- Plumbers’ putty (available at most home improvement and DIY stores)
- A screwdriver, or similar tool
Instructions on to Properly Use a Probe Access Port
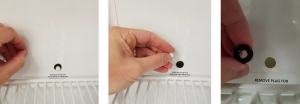
- Begin in front of the unit with the door open. Inside, on the rear wall, remove the white center caps and black O-ring gaskets from the inside of the unit, and then remove these from the outside of the unit (on the back). DON’T throw away the black O-ring gaskets because you will need these later on.
- Using a screwdriver or similar tool force out the silicone caulking that is inside the probe port. You should be able to see clearly through the probe port when you’re finished.
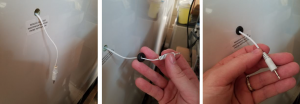
- Take your probe wire and thread it through the black O-ring gasket. Now thread the probe wire through the probe port and to the other side. Next install the black O-ring gasket back into position on the inside of the unit. This protects the wire from sharp edges.
- Thread the probe wire through the second black O-ring gasket on the outside of the unit. Then install that O-ring gasket back into position.
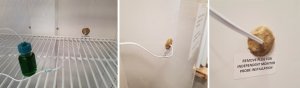
- Using the plumbers’ putty seal both sides of the probe port, preventing airflow through the probe access port.
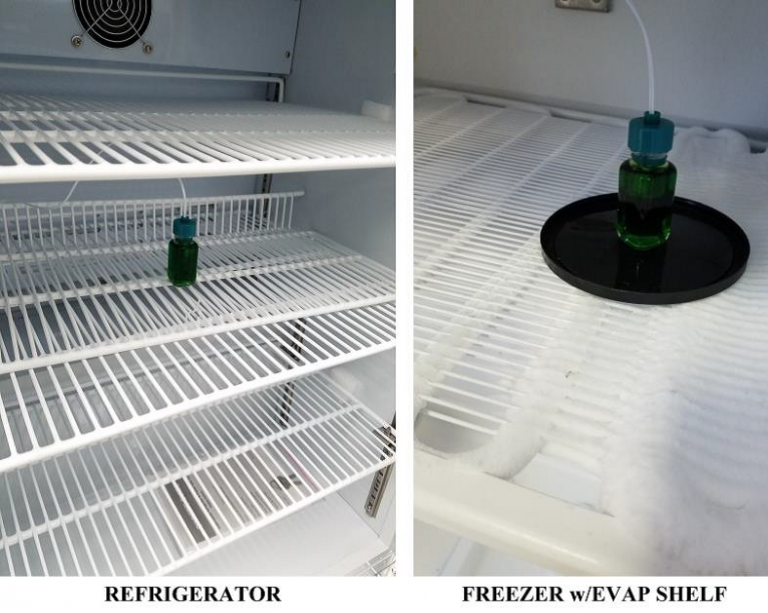
- Place your buffered probe into the most central part of the unit. If you purchased a freezer with evaporator coil shelves, then the probe will need to be isolated from the shelf in some way and not in direct contact with the shelf.
We hope this has been a helpful step-by-step tutorial on how to properly use your Futura and Clinicool Access Ports. Read more information on our Medical and Laboratory Refrigerators and Freezers.