Cell culture incubators used in labs need proper care and cleaning to maintain reproducible and accurate results. Proper care also leads to less repairs and a longer lifespan of the unit, saving you money in the long run. Below is a simple step by step procedure to thoroughly clean your incubator unit.
Before You Start Cleaning Your Cell Culture Incubators
Before you clean cell culture CO2 incubators, make sure you have rubber gloves, as you should never clean the unit with your bare hands. You will also need 70% ethanol as well as a sterile, non-woven cloth or paper towel.
Clean Cell Culture Incubators in 6 Easy Steps
- Turn the Power Off: Make sure the power to the incubator is turned off and just to be extra safe you can unplug the unit as well.
- Remove Interior Components: Remove the interior components of the incubator. Most incubators have interior components that are not built-in to the unit. Removing them prior to cleaning will make the process much easier and will allow for a more thorough cleaning. It is also recommended that you remove the components in the correct order: First you should remove the shelves, then the humidifying tray cover and the tray. Next remove the back duct, then the fan and finally, remove the stopper for the access port.
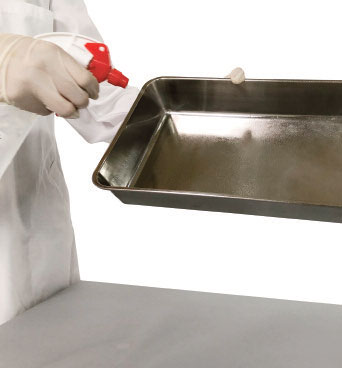
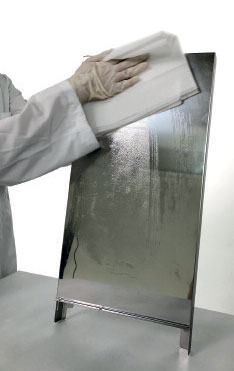
- Clean the Interior Components: Thoroughly clean the interior components of the incubator using the correct cleaning procedure. First, wash the components with a neutral detergent or soap. After you wash them, rinse everything with distilled water and make sure all soap is rinsed away. Finally, wipe the interior components dry with the sterile, non-woven cloth or paper towel.
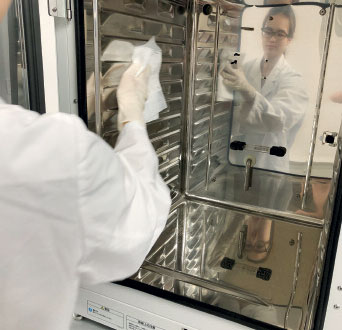
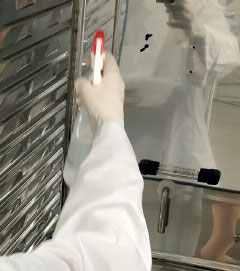
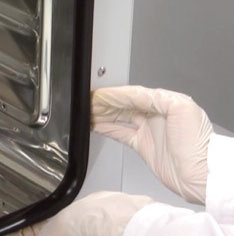
- Spray Disinfecting Alcohol: For this step you will need to spray the disinfecting alcohol (70% ethanol) inside of the unit. Make sure you DO NOT spray the alcohol directly into the sensor holes. Spray around the holes so the alcohol does not enter the sensor holes. Then you will want to thoroughly wipe off all alcohol with a non-woven, cloth or paper towel. Repeat this process on the internal components that you removed, the shelves and the water tray. Please make sure to spread the ethanol for disinfection to all corners of the inner door gasket of the incubator and sufficiently remove stains while wiping it clean. After wiping, confirm that the inner door gasket is securely in place and doesn’t have any creases. If the incubator is operated with the inner door gasket not in place, the humidified air will leak and will cause condensation between the unit and outer door.
- Replace the Interior Components: Replace the interior components of the incubator in reverse order of how you removed them in step 2. First replace the stopper for the access port, then replace the fan and make sure the fan spins smoothly. Next replace the back duct and then the humidifying tray cover and put in the tray. Make sure you put sterilized distilled water in the humidifying tray. Finally, replace the shelves.
- Let the Incubator Air Dry with the Door Ajar: For the final step to properly clean cell culture incubators is to let your incubator air dry with the door open. Before you turn the power back on, make sure the interior is completely dried out. Also check that there is no alcohol smell remaining. If you turn the power on while it is still damp inside, the 02 and C02 sensors may be damaged. If you are using a unit that is equipped with dual heat sterilization function or H2O2 (hydrogen peroxide) decontamination function, performing sterilization/decontamination before use will make prevention of contamination (bacterial contamination) more effective.
Other Basic Care & Cleaning Tips to Properly Clean Incubators
- Be sure to wear gloves to avoid cutting your hands on the interior component
- Do not use acid, alkali, or chlorine-based cleansers, disinfectants, or sanitizers
- Do not wipe with the same portion of the sterile non-woven cloth more than once. If you wipe another area with same portion of the cloth, you will be spreading bacteria around.
- Don’t forget to wipe the gasket and the inside of the door.
- Increase the frequency of cleaning
- Replace the humidifying water once every two weeks.
- Spray Biocidal ZF to the inside of chamber once every week.
Tips to Minimize the Risk of Contamination
- Locate the incubator in a clean room or a site where there are few people.
- Install the incubator some distance above floor level (The higher you go, the less floating bacteria are found). Use a roller base to facilitate cleaning around and under the incubators.
- Install the incubator in an area away from draughts and easy air intrusion when opening and closing the incubator doors. Beware of air dust and the air flow direction of any air conditioning.
- Ensure that there is no condensation inside chamber.
- Always keep the interior of an incubator clean and free from culture medium and/or water and fingerprints. They must be wiped off immediately if ever spilled or smeared (When there is a film or foreign matter foamed or placed on the surface of the copper alloy, sterilization effect will be lost).
- Always maintain and handle culture vessels under the maximum aseptic conditions possible. It is recommended to wipe off the bottom and periphery of the culture vessels with ethanol for sterilization when taking them into or out of an incubator.
- Minimize the door opening and closing frequency.